post
How to Create a Witch Hat Bookmark
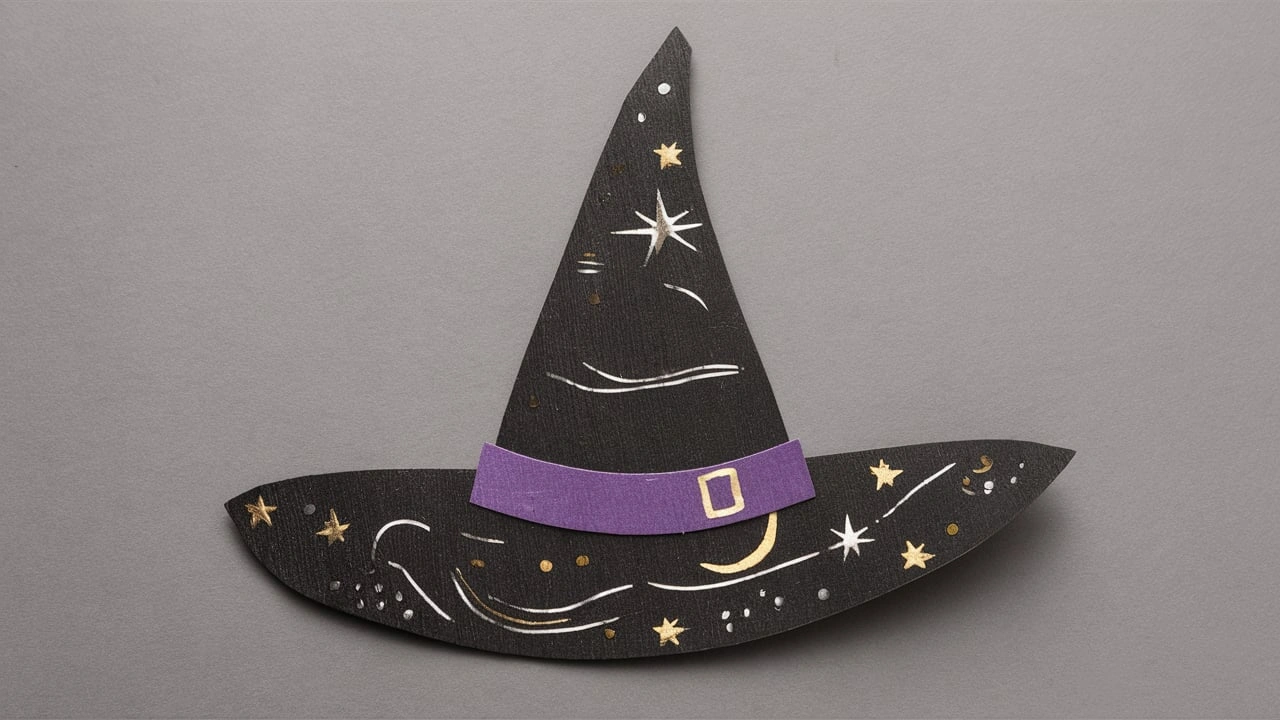
Table of Contents
Witch Hat Bookmark: A Detailed Guide and Lesson Plan
Creating a Witch Hat Bookmark is a fun and engaging craft project perfect for Halloween. Not only does it allow for creative expression, but it also results in a functional and festive tool that students can use throughout the spooky season. This article and lesson plan will provide an in-depth guide on how to create a Witch Hat Bookmark, offering step-by-step instructions, educational objectives, and suggestions for enhancing the learning experience. Whether you're a teacher looking to incorporate seasonal crafts into your classroom or a parent seeking a fun activity for your child, this guide will ensure your project is a success.Educational Objectives
By completing this project, students will:- Develop fine motor skills through cutting, gluing, and drawing.
- Enhance their understanding of shapes and geometry.
- Practice following multi-step directions.
- Engage in creative expression through decoration and design.
- Understand the functional purpose of a bookmark.
Materials Needed
To create a Witch Hat Bookmark, you will need the following materials:- Black construction paper
- Purple construction paper
- Scissors
- Glue
- Markers (white, silver, gold)
- Gold or yellow construction paper (for the buckle)
- Optional: glitter, stickers, or other decorative elements
Step-by-Step Instructions for Creating a Witch Hat Bookmark
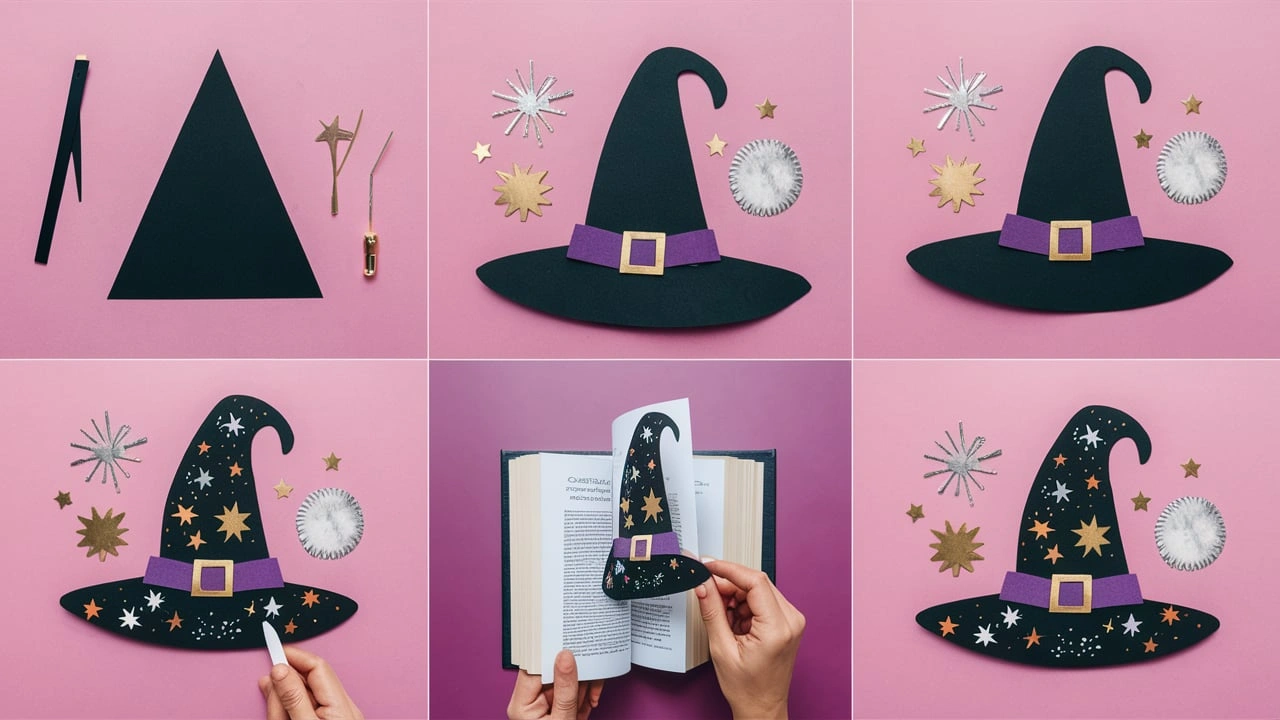
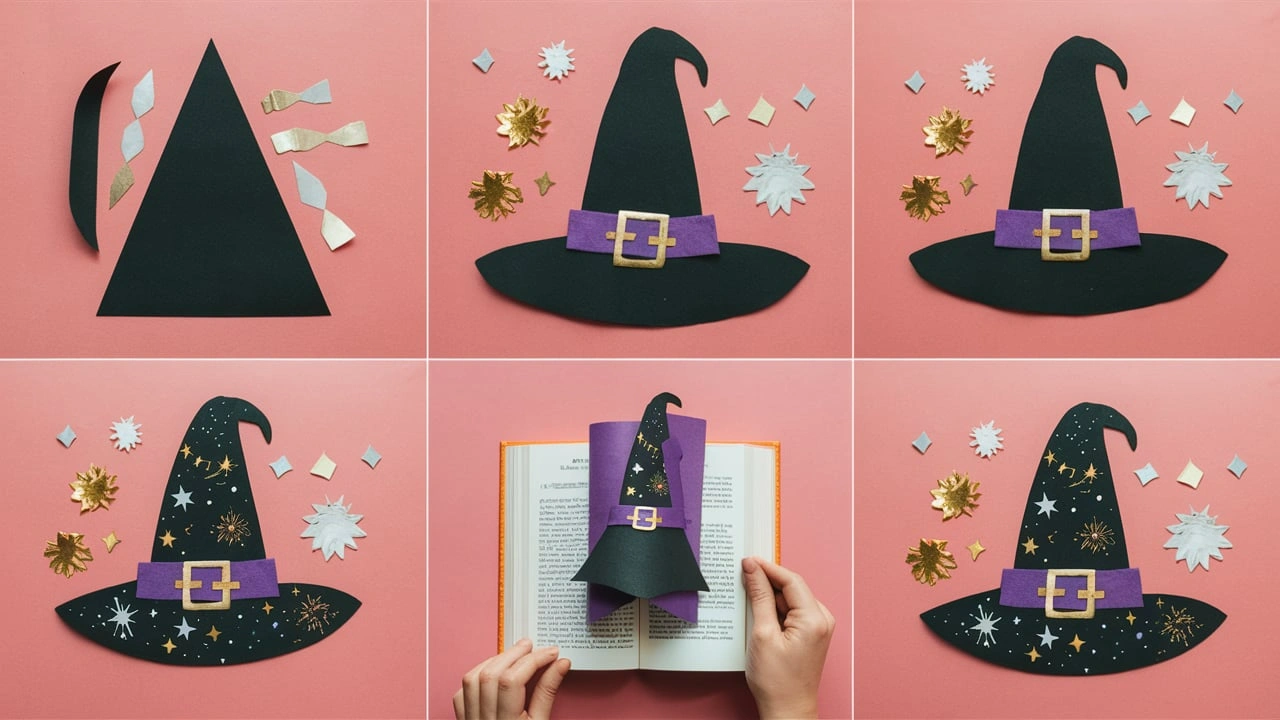
Step 1: Cutting the Shapes
The first step in creating a Witch Hat Bookmark is to cut out the basic shapes that will form the hat.- Black Construction Paper: Start by cutting a large triangle out of black construction paper. This triangle will form the pointed top of the witch's hat. The triangle should be tall and narrow, tapering to a sharp point at the top. The base of the triangle should be wide enough to accommodate the brim of the hat, which will be added later.
- Brim of the Hat: Next, cut a wide, curved strip from the black construction paper. This strip will serve as the brim of the hat. The brim should be slightly wider than the base of the triangle and should curve gently upwards at the ends. The curve gives the hat a whimsical and realistic appearance, mimicking the look of a classic witch's hat.
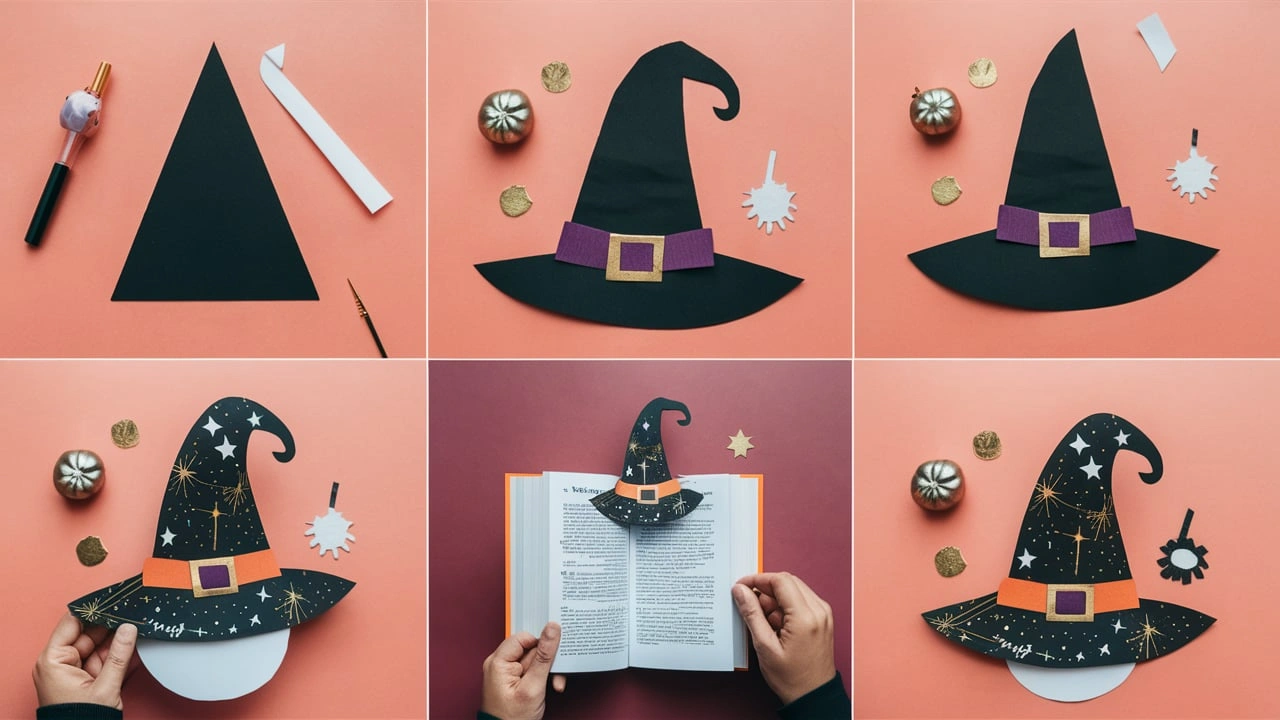
Step 2: Creating the Hatband
Now that the basic shapes are cut out, it's time to add a touch of color with the hatband.- Purple Construction Paper: Cut a thin strip from the purple construction paper. This strip will serve as the hatband, adding a contrasting color to the otherwise black hat. The band should be straight and long enough to wrap around the bottom of the triangle, just above the brim.
- Adding the Buckle: To add a bit of flair, cut a small rectangular buckle from gold or yellow construction paper. This buckle will be glued to the center of the purple hatband, giving the hat a classic and stylish look.
Step 3: Assembling the Hat
With all the pieces cut out, it’s time to assemble the hat.- Glue the Brim: Begin by gluing the curved brim to the bottom of the triangle. Make sure the brim is centered and aligned with the base of the triangle. Press down firmly to ensure the glue holds the pieces together.
- Attach the Hatband: Next, glue the purple hatband across the bottom of the triangle, just above the brim. The hatband should overlap slightly onto the brim, creating a seamless transition between the two parts of the hat. The buckle should be positioned in the center of the hatband.
Step 4: Adding Decorations
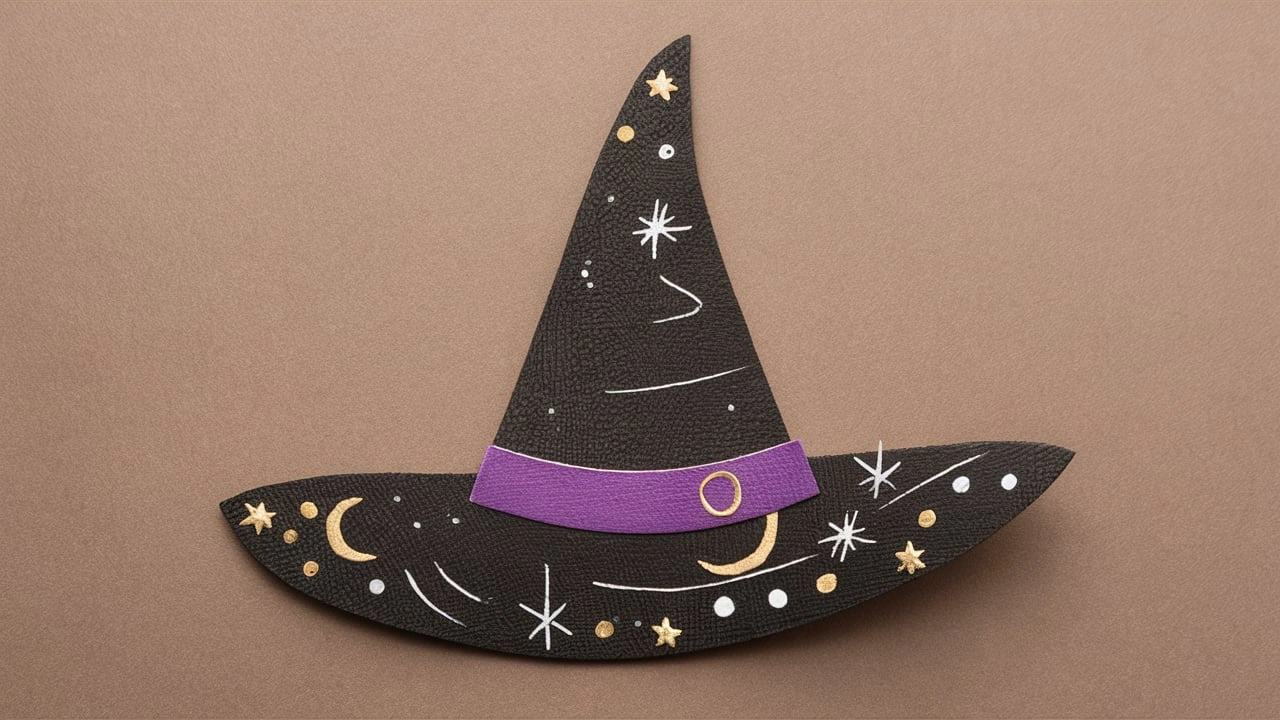
Now that the hat is assembled, it’s time to let creativity shine by adding decorations.- Markers and Paint: Use markers or paint to add decorative elements to the hat. In this case, consider using white, silver, and gold markers to draw stars, swirls, and other celestial designs on the hat. These decorations can be scattered across the hat, giving it a magical and enchanting appearance.
- Optional Decorations: For an extra touch of creativity, students can add glitter, stickers, or other decorative elements to their Witch Hat Bookmark. For example, a touch of silver glitter along the brim can give the hat a sparkling effect, while star-shaped stickers can add a three-dimensional element to the design.
Step 5: Final Touches and Functionality
The final step is to ensure that the bookmark is functional and ready for use.- Flatness: It's important to ensure that the bookmark remains flat throughout the process. The flat design is essential because the Witch Hat Bookmark is intended to be slipped between the pages of a book. A flat, sleek design ensures that the bookmark won’t damage the pages or add unnecessary bulk.
- Testing the Bookmark: To test the functionality, students can place their finished Witch Hat Bookmark into a book. The pointed tip of the hat should stick out from the top of the book, making it easy to find their place. The brim of the hat should sit flush against the page, marking the spot securely.
Lesson Plan: Creating a Witch Hat Bookmark
Grade Level:
Elementary School (Grades 2-5)Duration:
One 60-minute class sessionObjectives:
- Students will be able to follow multi-step directions to complete a craft project.
- Students will practice fine motor skills by cutting, gluing, and decorating.
- Students will explore color contrast and design elements in a creative context.
- Students will understand the functional purpose of a bookmark and how to create one.
Materials:
- Black construction paper
- Purple construction paper
- Scissors
- Glue
- Markers (white, silver, gold)
- Gold or yellow construction paper (for the buckle)
- Optional: glitter, stickers, or other decorative elements
Introduction (10 minutes):
- Begin by discussing the importance of bookmarks and how they help us keep our place in books.
- Show an example of a Witch Hat Bookmark and explain that the class will be making their own.
- Review the materials needed and ensure each student has them ready.
Step-by-Step Instruction (40 minutes):
- Step 1: Cutting the Shapes (10 minutes)
- Demonstrate how to cut the triangle for the hat and the curved strip for the brim.
- Assist students as needed, ensuring everyone has their shapes cut out.
- Step 2: Creating the Hatband (5 minutes)
- Show students how to cut the purple hatband and the gold buckle.
- Explain the importance of color contrast in design.
- Step 3: Assembling the Hat (10 minutes)
- Demonstrate how to glue the brim and hatband to the triangle.
- Ensure students align the pieces correctly.
- Step 4: Adding Decorations (10 minutes)
- Encourage students to be creative with their decorations.
- Suggest different patterns and designs they can draw on their hats.
- Step 5: Final Touches (5 minutes)
- Remind students to keep their bookmarks flat.
- Test the bookmarks in books to ensure they are functional.
Conclusion (10 minutes):
- Allow students to share their Witch Hat Bookmarks with the class, discussing their design choices.
- Review the key skills practiced during the project, such as cutting, gluing, and following directions.
- Discuss how the bookmark can be used in their reading, reinforcing its functional purpose.
Assessment:
- Observe students as they work, ensuring they follow directions and complete each step.
- Assess the finished bookmarks for craftsmanship, creativity, and functionality.
- Provide feedback on their design choices and how they followed the instructions.
Extension Activities:
- Writing Prompt: Have students write a short story about a witch who owns a magical hat. Encourage them to describe the hat in detail, using their Witch Hat Bookmark as inspiration.
- Math Connection: Discuss the geometric shapes used in the project, such as triangles and curves, and how they relate to other shapes students know.
- Art History: Introduce students to famous witches in literature and art, discussing how witches are depicted and what makes them iconic.